 Save to Pinterest
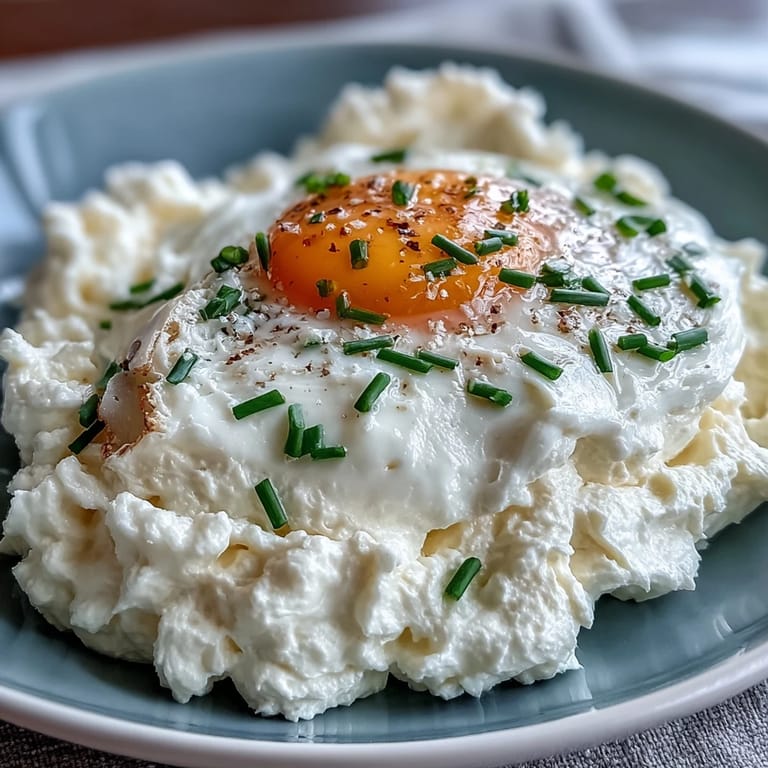
 The first morning I made cloud eggs, an unexpected sunbeam poured through my kitchen window and made the glossy whipped whites almost glow. The gentle hum of my mixer was the only sound, and something about sculpting clouds onto a baking sheet made the task feel playful rather than routine. I remember being surprised at how quickly the egg whites transformed from translucent to gloriously pillowy peaks. Sometimes breakfast feels mundane, but on days like this, even cracking eggs holds a little magic.
Once, I whipped up cloud eggs before a lazy Sunday breakfast with my sister, and we ended up debating the merits of cheddar versus Parmesan as the egg whites baked. The whole kitchen filled with the comforting scent of eggs and cheese, and the anticipation made our coffee taste even better.
Ingredients
- Eggs: Use the freshest large eggs possible—the whites whip higher, and the yolks retain that golden sheen.
- Salt: Just a pinch draws out flavor without making the eggs taste salty.
- Black pepper: A cracked grind as you fold the whites in makes a subtle difference in aroma.
- Parmesan or cheddar cheese (optional): Cheese adds nutty depth; always grate it fresh for the lightest texture in the clouds.
- Chives or parsley (optional): Fresh herbs give a pop of color and a gentle herbal lift—try both for contrast.
Tired of Takeout? 🥡
Get 10 meals you can make faster than delivery arrives. Seriously.
One email. No spam. Unsubscribe anytime.
Instructions
- Fire up the oven:
- Get the oven roaring hot at 450F (230C) and lay out parchment so nothing sticks as the clouds bake.
- Separate with care:
- Use cold eggs and slip the yolks into their own bowls—keeping them whole is easier when they are well chilled.
- Whip up a cloud:
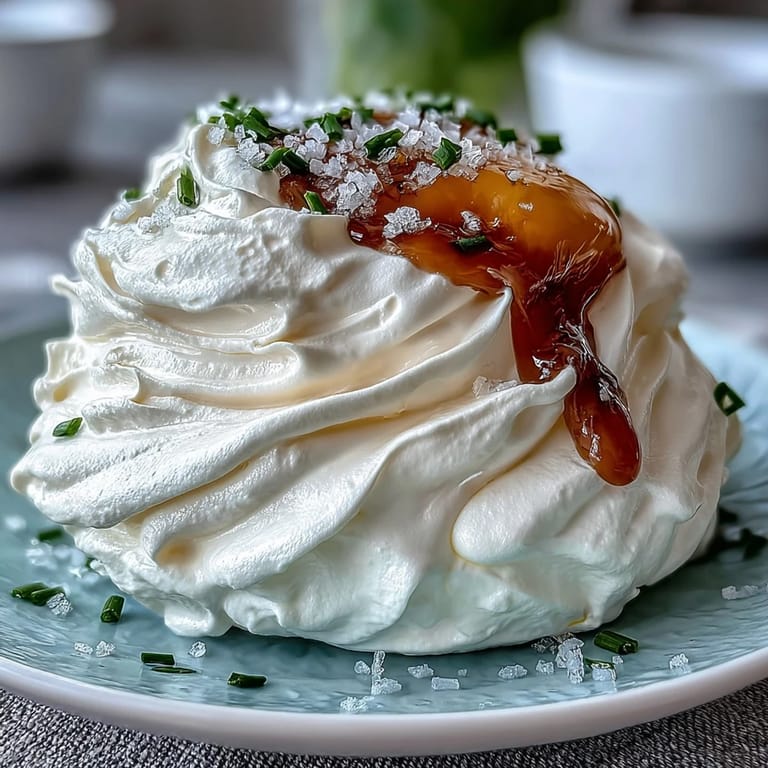
- Mix the whites on high speed until you see shiny, stiff peaks that barely move—listen for the gentle swish; that's your cue they're done.
- Fold in flavors:
- Gently blend in salt, pepper, and any cheese or herbs, barely stirring so you don’t flatten your peaks.
- Mound and shape:
- Scoop fluffy piles onto your tray, shaping little wells with a spoon—it's like sculpting snow mounds for yolk nests.
- First bake:
- Bake the clouds alone for 3 minutes so they hold structure for the yolk to rest later.
- Nestle and finish:
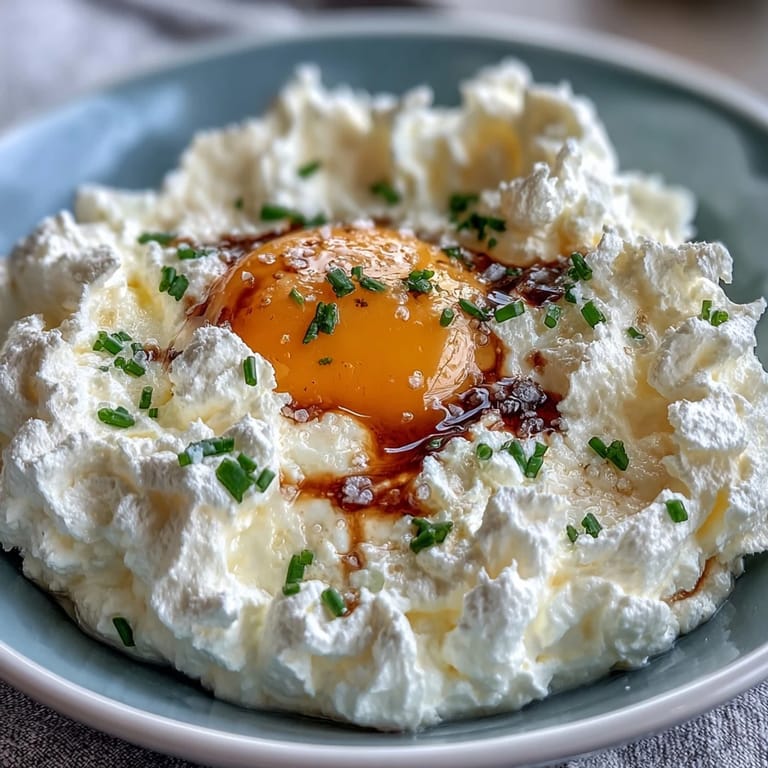
- Slip a yolk into each well, then bake 3–5 minutes more until they're just softly set, still shimmering in the center.
- Serve and savor:
- Slide the clouds onto plates, maybe with extra herbs on top, and enjoy them right away for the ultimate airy bite.
 Save to Pinterest
 The first time I served these to friends at brunch, the table went silent for a moment as everyone grinned at their cloud-topped plates—it’s the kind of dish that makes breakfast feel like an event.
Choosing the Best Add-Ins
I realized that folding in finely grated cheese or herbs not only boosts flavor but also adds playful color. It’s easy to swap in sautéed mushrooms or crispy bacon for a heartier version—the clouds hold surprises just as well as they hold yolks.
Making It Ahead—And Why Not to
Although it seems tempting to prep cloud eggs in advance, I learned they quickly lose their fluff and wobble. The joy is in their immediate freshness, when the yolk glistens, and the whites taste like morning air.
Serving Suggestions That Steal the Show
Cloud eggs atop a thin slice of warm toast are pure comfort, but I also love them with a tangle of peppery greens on the side when I want something light. Play with the base—try them over sautéed tomatoes or a spread of creamy avocado for a brunch upgrade.
- Add a dash of smoked paprika for subtle warmth.
- You can trim the parchment for a prettier plate presentation.
- Don’t forget to eat while hot—the clouds droop if they wait!
 Save to Pinterest
 Whether you’re dazzling guests, or just making yourself smile on a weekday, cloud eggs bring a little bit of wonder to the table. May your mornings feel a bit lighter and your breakfasts a lot more fun.
Recipe FAQs
- → How do I get perfectly stiff peaks?
Use a clean, dry bowl and ensure no yolk traces are in the whites. Whip at high speed until the whites form glossy peaks that hold shape. A metal bowl and room-temperature whites will whip more quickly.
- → Can I prepare the whites in advance?
Whipped whites are best used immediately to retain volume. You can separate eggs ahead of time, but whip and bake soon after whipping. If needed, keep separated yolks covered in a small bowl until ready.
- → How do I control yolk doneness?
Bake the clouds 3 minutes first, add yolks, then bake 3–5 minutes more. Shorter time yields runny yolks; longer gives a firmer yolk. Oven variances may require a minute adjustment.
- → What mix-ins work well without deflating the whites?
Finely grated hard cheeses, chopped herbs, or very small diced cooked ingredients (bacon bits, ham, sautéed mushrooms) fold in gently. Avoid heavy or wet add-ins that weigh down the foam.
- → What are ideal serving ideas?
Serve the clouds on toasted bread, alongside a green salad, or over avocado slices. Sprinkle extra herbs or cheese for contrast and add a squeeze of lemon for brightness if desired.
- → Any allergy or substitution notes?
The dish centers on eggs; for dairy-free versions omit cheese or choose a dairy-free grated alternative. There is no direct vegan substitute that replicates the same airy structure.