 Save to Pinterest
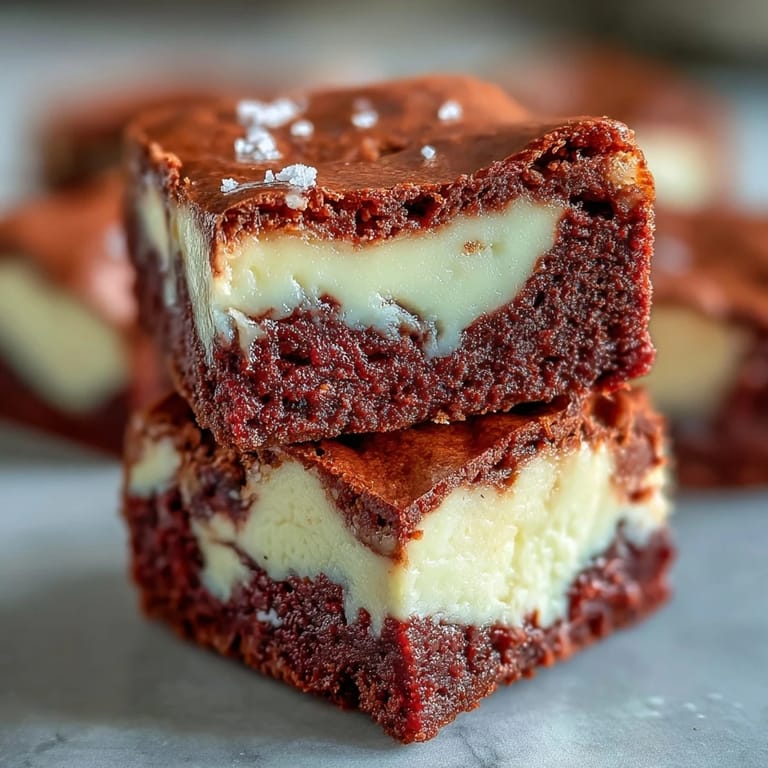
 The oven timer was ticking down, and I stood there watching the red and white swirls settle into the pan, wondering if I'd overdone the marbling. My sister had asked for something dramatic for her birthday, and I'd never combined brownies with cheesecake before. When I pulled them out, the kitchen smelled like a bakery that specialized in impossible cravings. Those first squares were gone before they even hit room temperature. I've been making them ever since, tweaking the swirl technique every time.
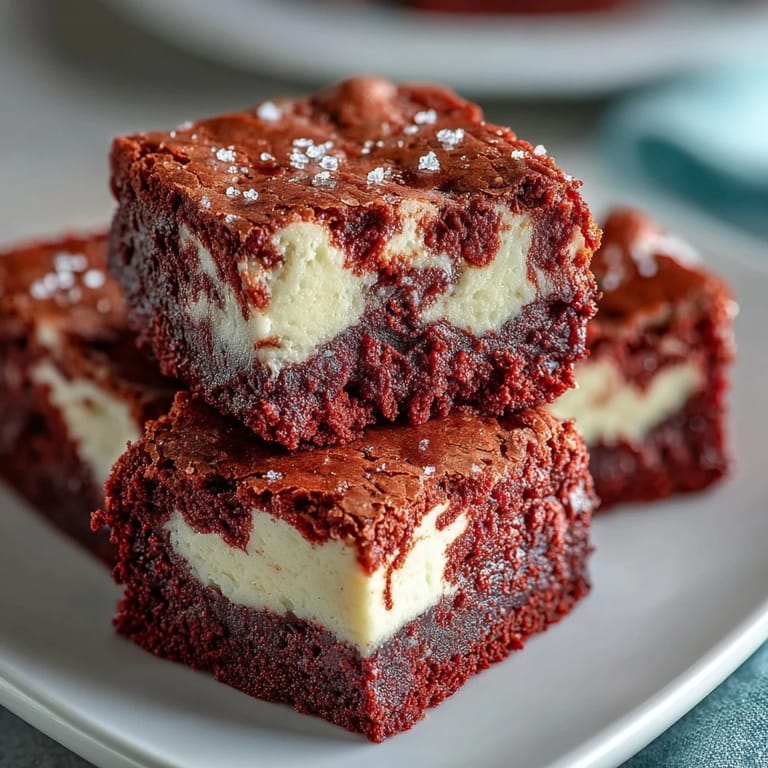
I brought a batch to a potluck once, and someone asked if I'd ordered them from a specialty shop. The red velvet against the white cheesecake does look almost too pretty to eat. But then you taste that first square, fudgy and tangy and rich, and presentation becomes secondary. They disappear fast, so I started doubling the recipe and hiding a few in the back of the fridge.
Ingredients
- Unsalted butter: Melted butter gives the brownies their dense, fudgy texture without making them greasy, and using unsalted lets you control the salt level perfectly.
- Granulated sugar: This sweetens both layers and helps create that signature crackly top on the brownie portion.
- Eggs: Room temperature eggs blend more smoothly into both batters, preventing lumps and ensuring an even bake.
- Vanilla extract: A little vanilla in each layer deepens the flavor and balances the tang from the cream cheese.
- Red food coloring: Gel coloring gives you the most vibrant red without thinning the batter, but liquid works if that is what you have.
- All-purpose flour: Just enough to give structure without turning the brownies cakey or dry.
- Unsweetened cocoa powder: This adds chocolate depth to the red velvet base, making it taste like more than just colored cake.
- Cream cheese: Softened cream cheese blends into a silky cheesecake layer, so let it sit out for at least 30 minutes before starting.
Tired of Takeout? 🥡
Get 10 meals you can make faster than delivery arrives. Seriously.
One email. No spam. Unsubscribe anytime.
Instructions
- Prep the pan:
- Line your baking pan with parchment paper, leaving enough overhang on two sides to lift the whole block out later. This makes cutting so much easier and keeps your pan clean.
- Mix the red velvet base:
- Whisk melted butter and sugar until smooth, then add eggs, vanilla, and food coloring, stirring until the batter turns a deep, even red. Sift in the flour, cocoa, and salt, folding gently just until no streaks remain.
- Reserve some batter:
- Scoop out about 1/4 cup of the red velvet mixture and set it aside in a small bowl. Spread the rest evenly across the bottom of your prepared pan.
- Make the cheesecake layer:
- Beat the softened cream cheese until it is completely smooth with no lumps, then add sugar, egg, and vanilla, mixing until the mixture is creamy and pale. Pour this over the red velvet layer and spread it gently to the edges.
- Swirl and bake:
- Drop spoonfuls of the reserved red velvet batter on top of the cheesecake, then drag a knife or skewer through in figure-eight motions to create marbled swirls. Bake at 175°C (350°F) for 35 minutes, until the center barely jiggles and a toothpick comes out with moist crumbs.
- Chill completely:
- Let the pan cool on a wire rack, then refrigerate for at least 2 hours before slicing. Cold brownies cut cleanly and the flavors meld beautifully after chilling.
 Save to Pinterest
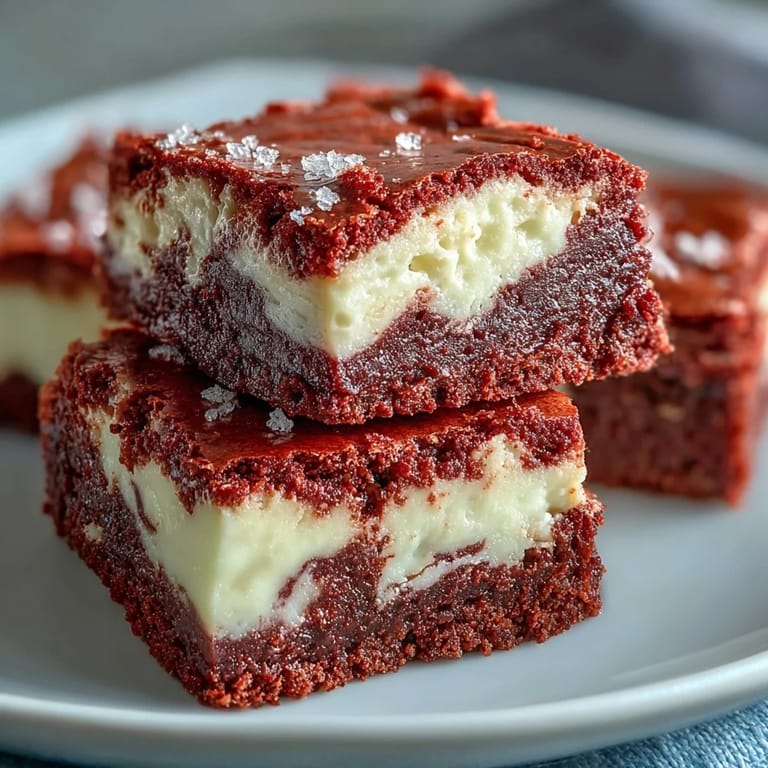
 The first time I served these at a dinner party, someone asked for the recipe before dessert plates were even cleared. I realized then that they work for any occasion, casual enough for a weeknight treat but impressive enough to anchor a holiday dessert table. They've become my go-to whenever I need something that looks like I spent all day baking but really only took an hour.
Getting the Swirl Just Right
I used to overthink the marbling and end up with a muddled mess instead of defined swirls. The trick is to drag your knife through in long, deliberate motions rather than stirring in circles. Start at one corner and pull the knife to the opposite corner, then repeat from a different angle. Three or four passes is all you need, any more and the layers blend into one color.
Storage and Make Ahead Magic
These brownies actually taste better the next day after the flavors have had time to settle in the fridge. I make them a day ahead for parties, cover the pan tightly with plastic wrap, and slice them cold just before serving. They keep for up to five days in an airtight container, though they rarely last that long in my house.
Customizing Your Brownies
Once you've mastered the basic recipe, it's easy to experiment. I've folded white chocolate chips into the red velvet batter for extra sweetness, and I've seen friends add a handful of crushed Oreos on top before baking. Some people skip the red coloring entirely and make them classic chocolate cheesecake brownies, which are just as delicious but less dramatic.
- Try adding a teaspoon of espresso powder to the brownie batter to deepen the chocolate flavor.
- Sprinkle mini chocolate chips over the cheesecake layer before swirling for extra texture.
- Dust the tops with powdered sugar just before serving for a festive finishing touch.
 Save to Pinterest
 These brownies remind me that some of the best desserts happen when you stop playing it safe and combine things that shouldn't work but absolutely do. I hope they become a favorite in your kitchen too.
Recipe FAQs
- → Can I use natural food coloring instead of artificial dye?
Yes, you can substitute with natural red food coloring or beetroot powder, though the color may be less vibrant. You may need to adjust the quantity to achieve your desired shade.
- → Why do my brownies turn out cakey instead of fudgy?
Overmixing the batter or overbaking can create a cakey texture. Fold ingredients gently until just combined and remove from the oven when the center is just set with a slight jiggle.
- → Can I make these brownies ahead of time?
Absolutely! These brownies actually taste better after chilling overnight. Store them in an airtight container in the refrigerator for up to 5 days, allowing flavors to meld beautifully.
- → How do I create perfect swirls?
Dollop the reserved red velvet batter in several spots across the cheesecake layer, then gently drag a knife or skewer through in figure-eight or circular motions. Don't overwork it—a few swirls create the best visual effect.
- → Can I freeze these brownies?
Yes, wrap individual brownies tightly in plastic wrap, then store in a freezer-safe container for up to 3 months. Thaw in the refrigerator overnight before serving.
- → What can I serve these brownies with?
These pair beautifully with vanilla ice cream, whipped cream, or fresh berries. A dusting of powdered sugar also adds an elegant finishing touch for special occasions.